When you need to add truly custom CSS rules to the project, the easiest approach is to just add the custom CSS into the main.css file. It acts as the primary stylesheet reference for Tailwind CSS when it creates the styles.
To customize the main.css file, you can go to WindPress menu and switch to main.css file editor.
3.x
Default content
When using Tailwind CSS 3.x, the default content of the main.css file is as follows:
@tailwind base;
@tailwind components;
@tailwind utilities;
main.css file to its default by clearing its contents and clicking the Save Changes button.4.x
Default content
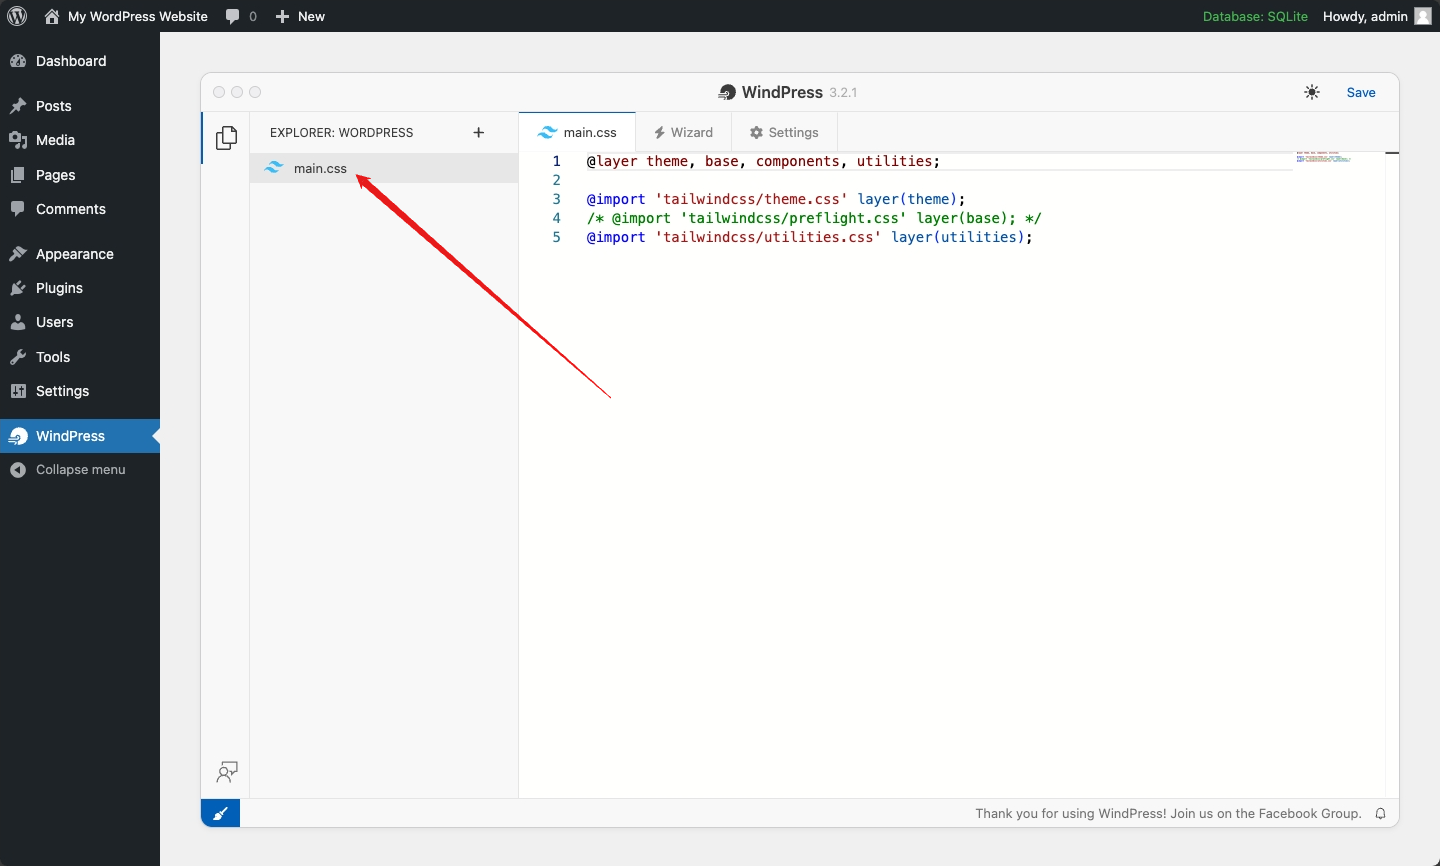
When using Tailwind CSS 4.x, the default content of the main.css file is as follows:
@layer theme, base, components, utilities;

@import "tailwindcss/theme.css" layer(theme) theme(static);
/* @import "tailwindcss/preflight.css" layer(base); */
@import "tailwindcss/utilities.css" layer(utilities);
main.css file to its default by clearing its contents and clicking the Save Changes button.Preflight
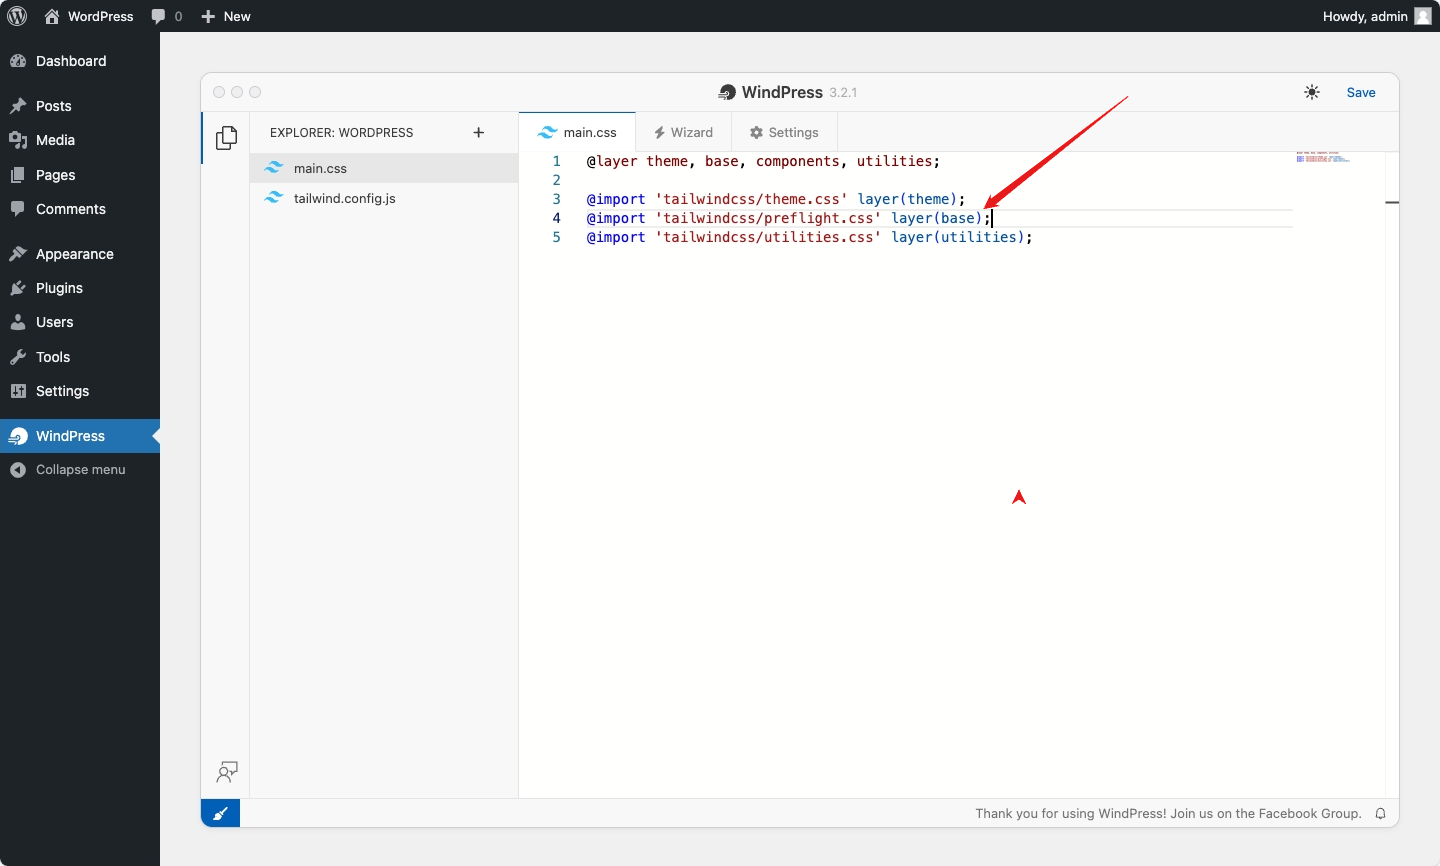
Preflight styles are the base styles that normalize the browser styles to ensure a consistent look and feel across different browsers.
In Tailwind CSS 4.x, the Preflight styles can be enabled by importing the tailwindcss/preflight.css file into the main.css file.
Preflight disabled by default
You can enable the Preflight on your project by uncommenting the @import 'tailwindcss/preflight.css' layer(base); line in the main.css file.
@layer theme, base, components, utilities;

@import 'tailwindcss/theme.css' layer(theme);
@import 'tailwindcss/preflight.css' layer(base);@import 'tailwindcss/utilities.css' layer(utilities);
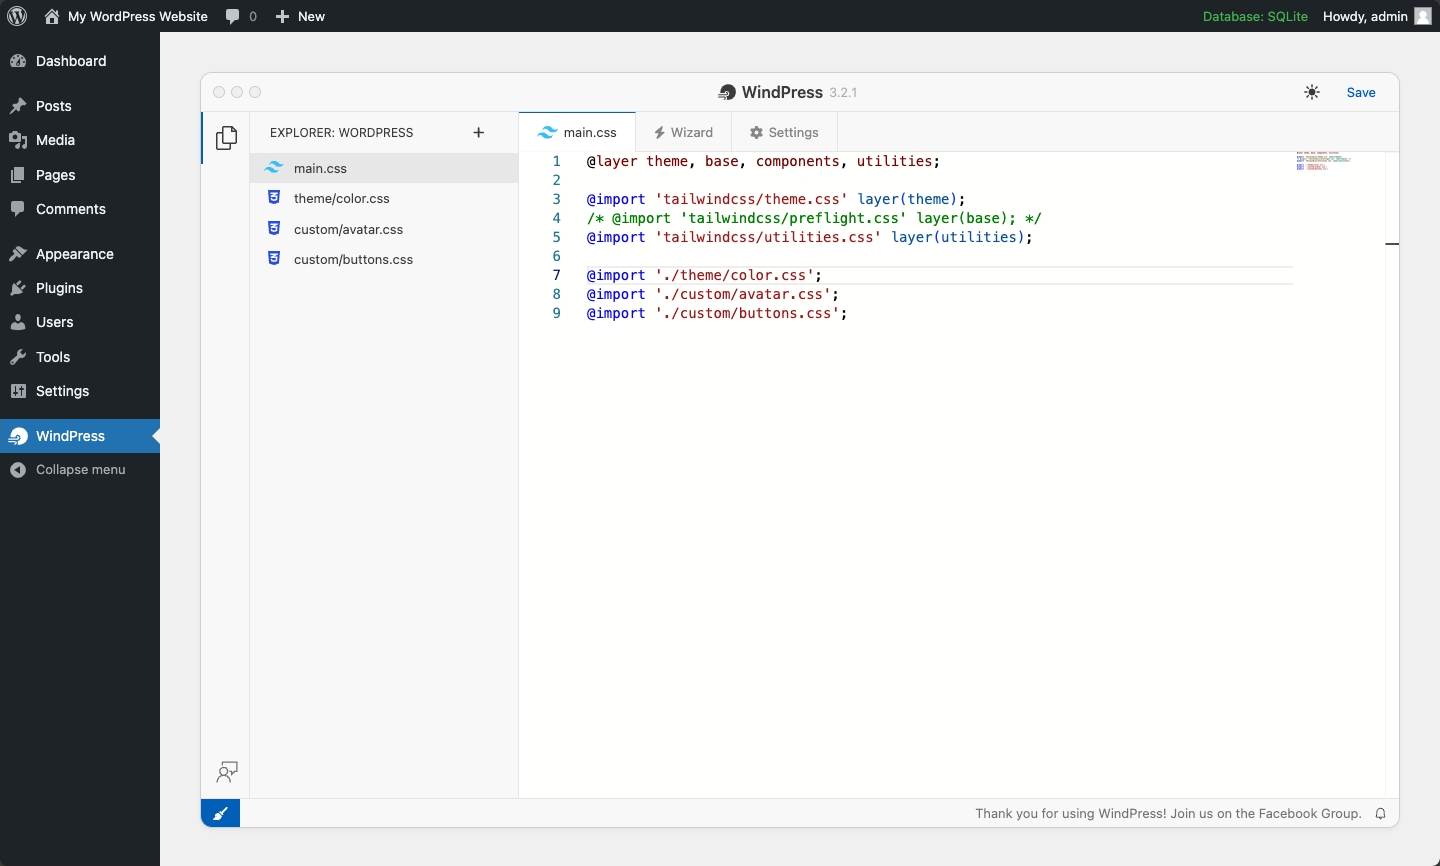
Importing additional CSS files
WindPress has a simple file system that allows you to create local custom CSS files and can be referenced in the main.css file using the @import at-rule with the relative path to the file (started with ./).
Additionally, if the path to the file is not an url or relative path, WindPress will try to resolve it as a npm package via esm.sh.
For example, you can create custom CSS files and import them into the main.css file as shown below:
/* this is Simple File System */
@import './theme/color.css';
@import './custom/avatar.css';
@import './custom/buttons.css';

/* this is CDN URL */
@import 'https://cdnjs.cloudflare.com/ajax/libs/animate.css/4.1.1/animate.min.css';

/* this is npm package */
@import 'daisyui@beta'; /* this will be loaded from https://esm.sh/daisyui@beta/index.css */
@import 'open-props/buttons.min.css'; /* this will be loaded from https://esm.sh/open-props/buttons.min.css */
Tailwind CSS plugins
In the Tailwind CSS 4.x, a Tailwind CSS plugin can be added to the project by importing the plugin file into the main.css file using the @plugin directive.
The Tailwind CSS plugins can be added via CDN or local files.
With the WindPress' simple file system, you can create local custom Tailwind CSS plugins and import them into the main.css file with the relative path to the file (started with ./).
Additionally, if the path to the file is not an url or relative path, WindPress will try to resolve it as a npm package via esm.sh.
For example, you can add the @tailwindcss/typography and @tailwindcss/forms plugin to the project by importing the plugin file via the esm.sh, jsDelivr or Skypack CDN into the main.css file as shown below:
/* via esm.sh CDN */
@plugin 'https://esm.sh/@tailwindcss/typography';
@plugin '@tailwindcss/forms' { /* this will be loaded from https://esm.sh/@tailwindcss/typography */
    strategy: 'class';
}

/* via Skypack CDN */
@plugin 'https://cdn.skypack.dev/@tailwindcss/typography';
@plugin 'https://cdn.skypack.dev/@tailwindcss/forms' {
    strategy: 'class';
}

/* via jsDelivr CDN */
@plugin 'https://esm.run/@tailwindcss/typography';
@plugin 'https://esm.run/@tailwindcss/forms' {
    strategy: 'class';
}
Tailwind CSS configuration
In the Tailwind CSS 4.x, the Tailwind CSS configuration can be imported into the main.css file using the @config directive via CDN or local files.
With the WindPress' simple file system, you can create local custom Tailwind CSS configuration files and import them into the main.css file with the relative path to the file (started with ./).
The Tailwind CSS configuration supports the JavaScript package.
For example, you can customize the Tailwind CSS configuration by importing the tailwind.config.js file into the main.css file as shown below:
@config './tailwind.config.js';
Scanning additional Sources
Different implementation
@source directive in the main.css file is different from the original implementation of Tailwind CSS v4 and may not be compatible with it.
In the production environment, WindPress scan your project to create a single CSS file that includes only the styles that are used.
To scan additional source files, you can add the source files to the main.css file using the @source directive.
Currently, WindPress supports the following providers can be used to scan the source files:
File URL
A static file is added as the source using the file URL.
The pattern to add the source from the file URL is as follows:
@source "[file_url]";
The file_url is the URL of the file that you want to add as the source.
For example, you can add the source from the file URL using the @source directive as shown below:
@source "https://esm.sh/flowbite/dist/flowbite.min.js?raw";
jsDelivr CDN
Some of Tailwind CSS libraries may require you to scan their package content from the node_modules directory.
As WindPress run on the browser, it doesn't use the Node.js environment to scan the package content from the node_modules directory. To scan the package content from the node_modules directory, we can use the jsDelivr CDN which provides the package content via CDN.
The patern to scan the package content from the jsDelivr CDN is as follows:
@source "jsdelivr:[package_name][@version][/file_path]";
The package_name is the name of the package. The version is the version of the package. The file_path is the path to the file that you want to add as the source, it support the glob pattern.
For example, to scan the node_modules/preline/dist/*.js file from the preline package, you can add the source from the jsDelivr CDN using the @source directive as shown below:
@source "jsdelivr:[email protected]/dist/*.js";
wp-content directory
WindPress allows you to scan the source files from the wp-content directory of the WordPress installation.
The pattern to add the source from the wp-content directory is as follows:
@source "wp-content:[file_path]";
The file_path is the path to the file that you want to add as the source, it support the glob pattern.
For example, to scan our custom theme named my-theme from the wp-content/themes/my-theme directory for any php, html, twig, and js files as the source, you can using the @source directive as shown below:
@source "wp-content:themes/my-theme/**/*.{php,html,twig,js}";